


HOW DOES IT WORK?
After launching the plugin, the following functions are available:
1. Pipies import

This option allows you to import pipe systems (Pipe Type) into the project. Pipe types have defined pipe segments and fittings.
2. Loading project settings

This option allows you to import project settings - lists, quantities, sheets, as well as default levels.
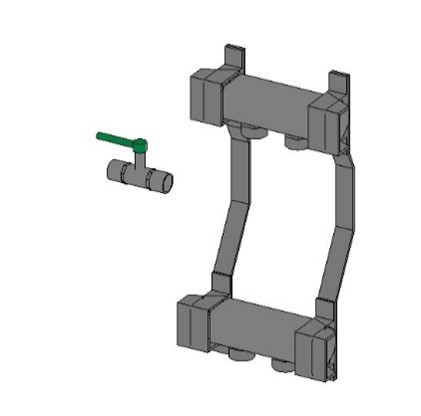
3. Fittings panel

Thanks to this group of options, it is possible to load various types of valves and manifolds into the project.
- Projection of fittings and manifold


- 3D view of the fittings and manifold
4. Edit mode panel

Thanks to this group of options, you can make adjustments to the connections of the elements used.
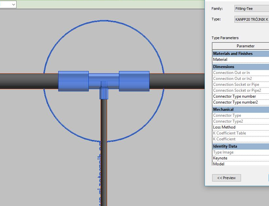
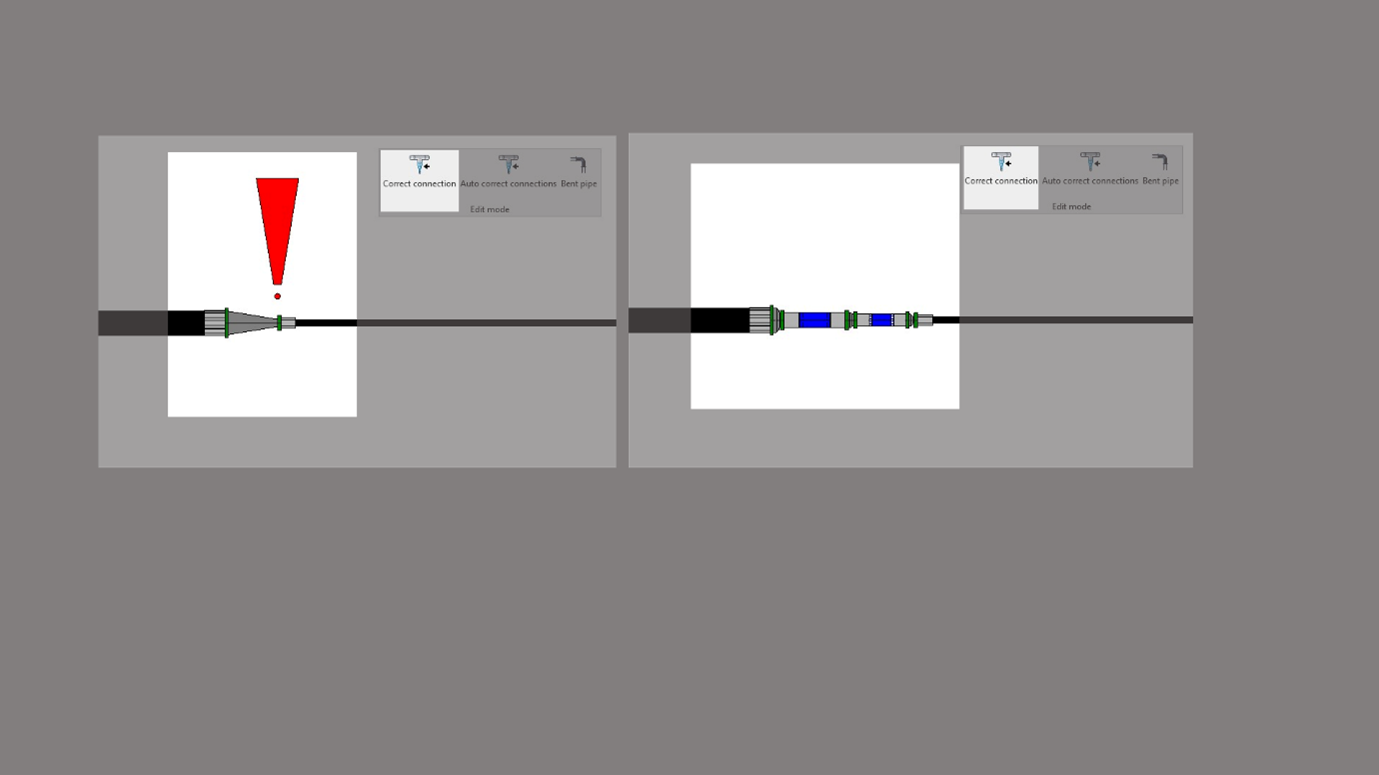
- Correct connections

After importing the families, you can use the "correct connectopm" option. For example, in the case of tee connections with a large diameter difference.
In Revit, this will be represented as follows:
After using the "correct connection" function, we will see a connection in which an additional piece of a pipe and a reduction will be added.
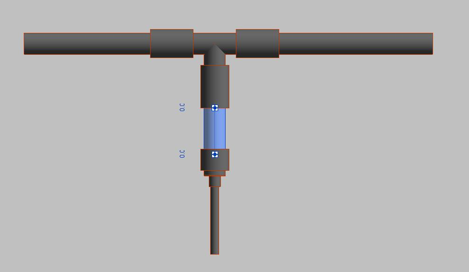
We will also encounter a similar situation when changing the diameter of the pipe or in the case of connecting the pipe with mechanical elements.
- Connection autocorrect

This option allows you to draw pipes where the connections are corrected automatically at the end of the drawing process.
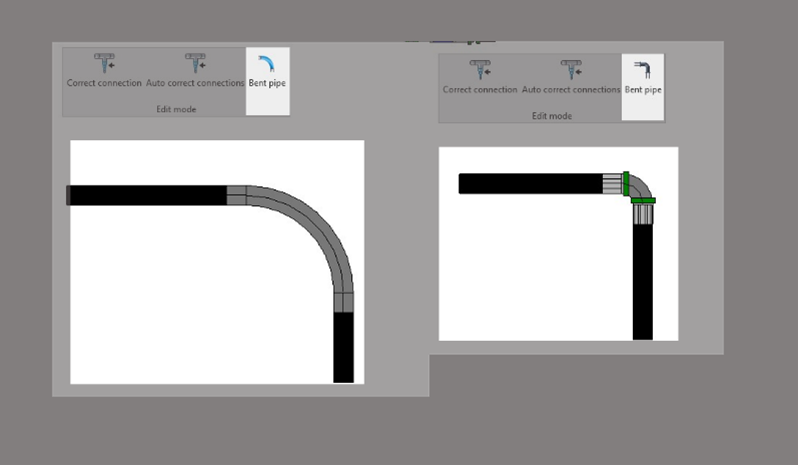
- Bent pipe

This function changes the logic of the elbows so that you can draw using a fitting imitating a pipe.
5. Import from SET program

After clicking the button, a window will be displayed, in which the following program controls are available.

During the import, we can select the appropriate parameters to import all or only selected installations (CH, H2O, CC), as well as storeys.
Instead of pipes, insert placeholder pipes
Selecting this option will generate pipes in the form of placeholder pipes. The diameter of the placeholder pipes is not real. Installation modeled this way looks like a "pipe route". Placeholder pipes have all data imported from the SET or the C.H. program. They can be transformed into pipes using the Revit tool or by using the Convert the placeholder pipe into a pipe.
Convert the placeholder pipe into a pipe
Selecting this option will automatically convert placeholder pipes into pipes.
The plugin uses the default Revit fittings included in the mechanical template. The angles of fittings allowed by Revit are from 3 ° to 177 °.
Import utensils
The radiators, fittings and other devices will be loaded. Only those groups that are necessary will be loaded into the project. The program does not read the whole group library.
Floor radiators are loaded as two groups - element representing the shape and element representing the hydraulic data. Revit can not determine the shape of a floor heater - it is generated as a ceiling. The hydraulic element consists of two balls representing the place where the radiator is connected. In the hydraulic element there are radiator data, eg spacing and diameter of pipes, producer, etc.
Import parameters of pipes and utensils
Device parameters will be imported from the SET or the C.H. program (eg nominal diameters, valve settings, etc.) and device configurations will be created.
Create storey views
Selecting this option will create views corresponding to storeys in the SET or the C.H. program. The labels (markings) of pipes, radiators, floor radiators and valves will also be generated.
Import the installation
By pressing this button, the installation saved in the file indicated in the "Installation project file" field, will be imported.
Replace the installation
Performs the subsequent removal and import of the installation indicated in the "Installation project file" control
Delete the installation
This option will remove from the Revit the installation file indicated in the control "Installation project file". All elements containing in the "project" parameter the same name as in the selected import file will be deleted
6. Export to the gbXML

This function allows you to export the project to the gbXML format. This is an extension of the normal gbXML export present in Revitt to fill empty thermal data in materials so that their thickness/width is not missed during export. If this option is used, the plugin makes sure that the walls exported to gbXML will have the declared width of the walls.