


JAK TO DZIAŁA?
Po uruchomieniu wtyczki dostępne są następujące funkcje:
1. Import przewodów
![]()
Opcja ta pozwala na zaimportowanie systemów rur (Pipe Type) do projektu. Typy rur posiadają zdefiniowane segmenty rur oraz kształtki.
2. Wczytanie ustawień projektu
![]()
Dana opcja pozwala na zaimportowanie ustawień projektu – zestawień, ilości, arkuszy, jak również poziomów domyślnych.
3. Panel Armatura
![]()
Dzięki tej grupie opcji można wczytać do projektu różne typy zaworów, jak również rozdzielaczy.
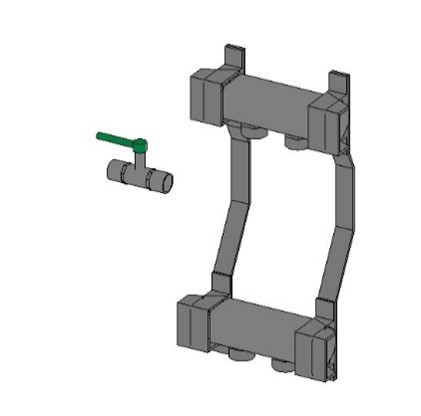
- Rzut armatury i rozdzielacza
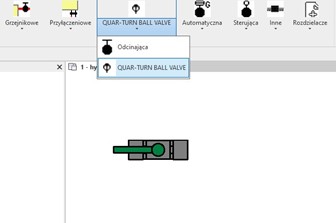
- Widok 3D armatury i rozdzielacza
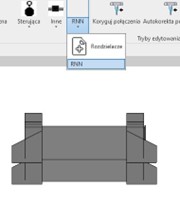
4. Panel Tryb edytowania
![]()
Dzięki tej grupie opcji można dokonać korekty połączeń użytych elementów.
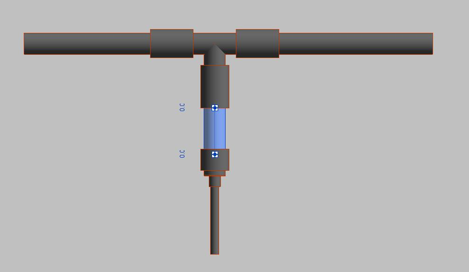
- Koryguj połączenia
![]()
Po zaimportowaniu rodzin można skorzystać z opcji „koryguj połączenie”. Np. w przypadku połączeń trójnikowych z dużą różnicą średnic.
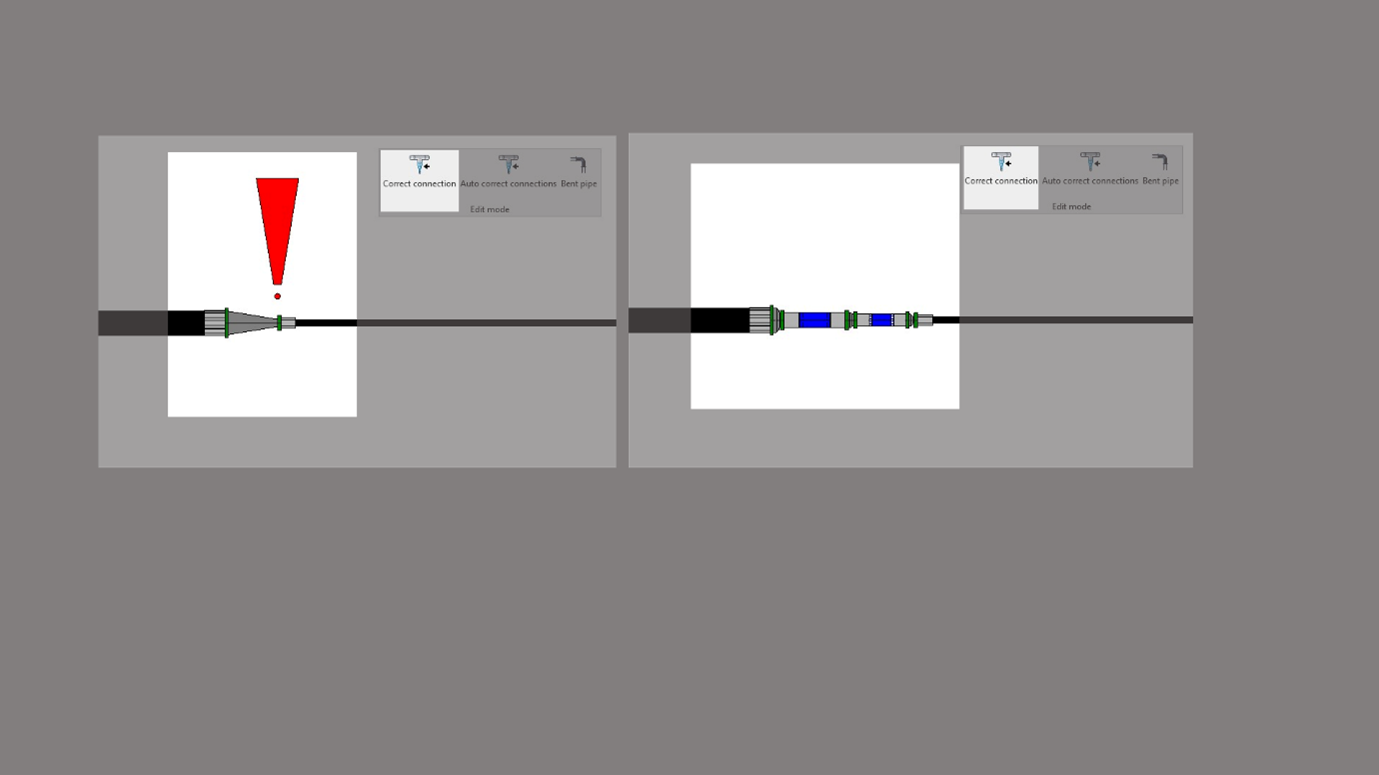
W Revicie zostanie to przedstawione w następujący sposób:
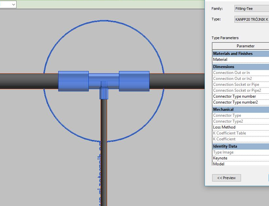
Po użyciu funkcji „koryguj połączenie” zobaczymy połączenie, w którym zostanie dodany dodatkowy fragment przewodu oraz redukcja.
Z podobną sytuacją spotkamy się również przy zmianie średnicy przewodu czy w przypadku połączeń przewodu z elementami mechanicznymi.
- Autokorekta połączeń
![]()
Dana opcja umożliwia rysowanie przewodów, gdzie połączenia są korygowane automatycznie w momencie zakończenia procesu rysowania.
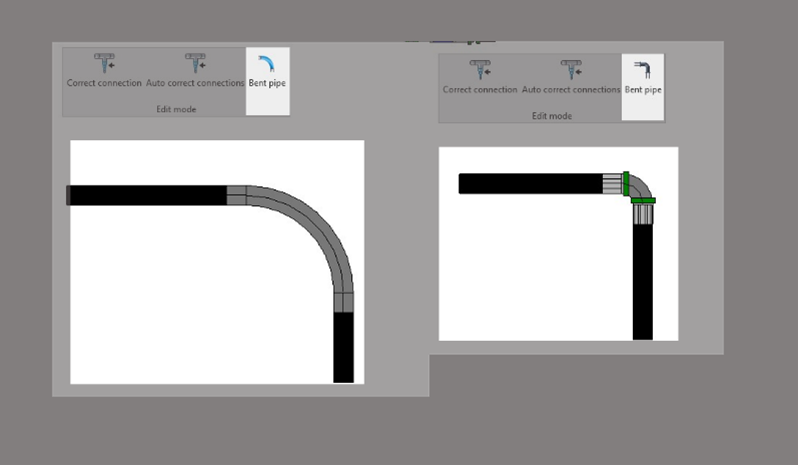
- Rura gięta
![]()
Funkcja ta zmienia logikę kolanek tak, aby można było rysować wykorzystując kształtkę imitującą przewód.
5. Import z programu SET
![]()
After clicking the button, a window will be displayed, in which the following program controls are available.
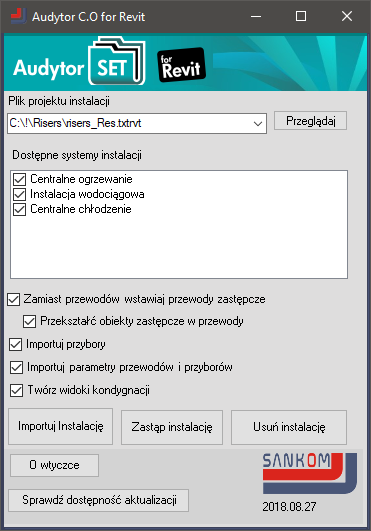
Instead of pipes, insert placeholder pipes
Selecting this option will generate pipes in the form of placeholder pipes. The diameter of the placeholder pipes is not real. Installation modeled this way looks like a "pipe route". Placeholder pipes have all data imported from the SET or the C.H. program. They can be transformed into pipes using the Revit tool or by using the Convert the placeholder pipe into a pipe.
Convert the placeholder pipe into a pipe
Selecting this option will automatically convert placeholder pipes into pipes.
The plugin uses the default Revit fittings included in the mechanical template. The angles of fittings allowed by Revit are from 3 ° to 177 °.
Import utensils
The radiators, fittings and other devices will be loaded. Only those groups that are necessary will be loaded into the project. The program does not read the whole group library.
Floor radiators are loaded as two groups - element representing the shape and element representing the hydraulic data. Revit can not determine the shape of a floor heater - it is generated as a ceiling. The hydraulic element consists of two balls representing the place where the radiator is connected. In the hydraulic element there are radiator data, eg spacing and diameter of pipes, producer, etc.
Import parameters of pipes and utensils
Device parameters will be imported from the SET or the C.H. program (eg nominal diameters, valve settings, etc.) and device configurations will be created.
Create storey views
Selecting this option will create views corresponding to storeys in the SET or the C.H. program. The labels (markings) of pipes, radiators, floor radiators and valves will also be generated.
Import the installation
By pressing this button, the installation saved in the file indicated in the "Installation project file" field, will be imported.
Delete the installation
This option will remove from the Revit the installation file indicated in the control "Installation project file". All elements containing in the "project" parameter the same name as in the selected import file will be deleted
Replace the installation
Performs the subsequent removal and import of the installation indicated in the "Installation project file" control